{ DIY }
BETTER BUNNIES
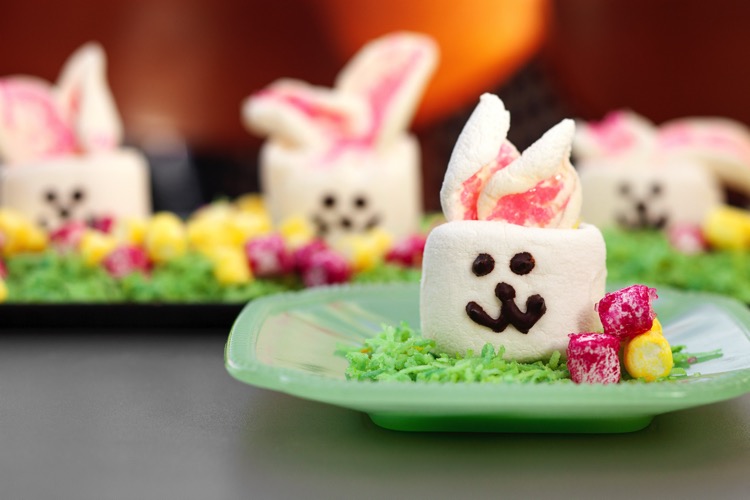
These cute marshmallow treats are free of chemical dyes. So, hop to it!
by Marie Brawn | Photo by Mandy Schaffer
Looking for a healthier way to celebrate the sweetness of spring? These festive homemade marshmallows colored with natural dyes make cute centerpieces and fun desserts. You can purchase natural dyes at a specialty grocery store and cake drip at any store that sells cake decorating supplies.
Make Marshmallows
Place the gelatin and ½ cup of the ice cold water into the bowl of a stand mixer, with the whisk attachment nearby. In a saucepan, combine the remaining water with the granulated sugar, corn syrup, and salt. Cover. Cook over medium-high heat for 3 to 4 minutes. Uncover, attach a candy thermometer clip to the side of the pan, and cook 7 to 8 minutes or until the mixture reaches 240 degrees. Immediately remove from heat. With the whisk and while running your mixer at low speed, slowly pour the sugar syrup down the side of the bowl into the gelatin mixture. Once you have added all of the syrup, increase the mixer speed to high. Whip about 12 to 15 minutes, until the mixture becomes very thick and lukewarm. Add the vanilla during the last minute of whipping.
Prepare Pan
While the marshmallow mixture is whipping, prepare the pan. Combine the confectioner’s sugar and cornstarch in a small bowl. Spray a 13 by 9 inch metal baking pan with the nonstick cooking spray. With the sugar and cornstarch mixture, completely coat the bottom and sides of the baking pan. Return the remaining sugar mixture to the bowl for later use.
Bunnies and Eggs
When the marshmallow mixture and pan are ready, pour the mixture into the prepared pan, using a lightly oiled spatula to spread evenly. Dust the top with enough of the remaining sugar and cornstarch mixture to lightly cover. Reserve the rest for later. Allow the marshmallow sheet to sit uncovered for at least 4 hours, or overnight.
Turn the marshmallow sheet out onto a cutting board. Using a pizza wheel dusted with the confectioner’s sugar mixture, cut the marshmallow sheet into 1–inch squares for bunny heads. Divide several 1–inch squares in half to form bunny ears. Cut several 1–inch squares into small pieces to use as mini-Easter eggs. Lightly dust all sides of each marshmallow with the remaining sugar/cornstarch mixture, using more, as needed.
Ears, Eyes, and Whiskers
Paint a strip of pink on each bunny ear with natural dye and set aside to dry. Paint eyes and whiskers on the bunny heads with chocolate cake drip. When the ears are dry, attach two ears to each bunny head by applying a drop of cake drip to the base of each ear and pressing two gently onto each head. Set aside until firm.
Easter Eggs and Grass
Experiment with a variety of natural dyes to color your mini-Easter eggs. Combine a few drops of dye with several mini-marshmallow eggs in a plastic container and shake lightly. For deeper colors, add more dye. Set out to dry. For grass, place 1 cup of shredded coconut in a plastic sandwich bag and add a few drops of green dye. Toss the bag lightly until the coconut is thoroughly green and set out to dry. When everything is dry and firm, set your bunnies in a field of coconut grass, strewn with colorful Easter mini-eggs, or store in an airtight container for up to 3 weeks.
MARSHMALLOWS
3 (1 oz) pkgs unflavored gelatin
1 cup ice cold water, divided
1½ cups granulated sugar
1 cup light corn syrup
¼ tsp kosher salt
1 tsp vanilla extract
¼ cup confectioner’s sugar
¼ cup cornstarch
Nonstick cooking spray
BUNNY FACES AND GRASS
Natural dye (in colors to make pink, brown, and green)
Chocolate cake drip
Shredded coconut